

 To make this Chicken Pot Pie Casserole, you’ll need cooked chicken,
a handful of frozen vegetables, a simple stovetop gravy, and biscuit dough. That’s it.
No pie crust to roll out.
No complicated steps.
Just a creamy, savory filling topped with golden biscuits that bake up fluffy right in the oven.
If you love classic chicken pot pie but don’t always love the extra work,
this is the version you’ll actually make on a weeknight.
It has that familiar, nostalgic flavor—rich sauce, tender chicken, cozy vibes—
with a shortcut that makes it completely doable.
The bottom line: all the comfort, none of the fuss.
For Baked Chili Cheese Dogs
- Hot Dogs – Use your favorite brand of beef or classic hot dogs. Any standard-sized dog works well here.
- Hot Dog Buns – Soft buns hold everything together. Regular or bakery-style both work.
- Chili – Canned chili keeps things quick and easy, but homemade chili works just as well if you have it on hand.
- Shredded Cheddar Cheese – Melts beautifully over the chili. You can also use Colby Jack or a Mexican blend.
- Butter (Optional) – Brushing the tops of the buns adds extra flavor and helps them toast up nicely in the oven.
Optional Toppings
- Diced Onions – Add a little crunch and sharp flavor.
- Sliced Jalapeños – For a bit of heat.
- Sour Cream – A cool and creamy contrast to the warm chili.
- Fresh Cilantro or Green Onions – For a pop of freshness.
- Extra Shredded Cheese – Because more cheese is never a bad idea.
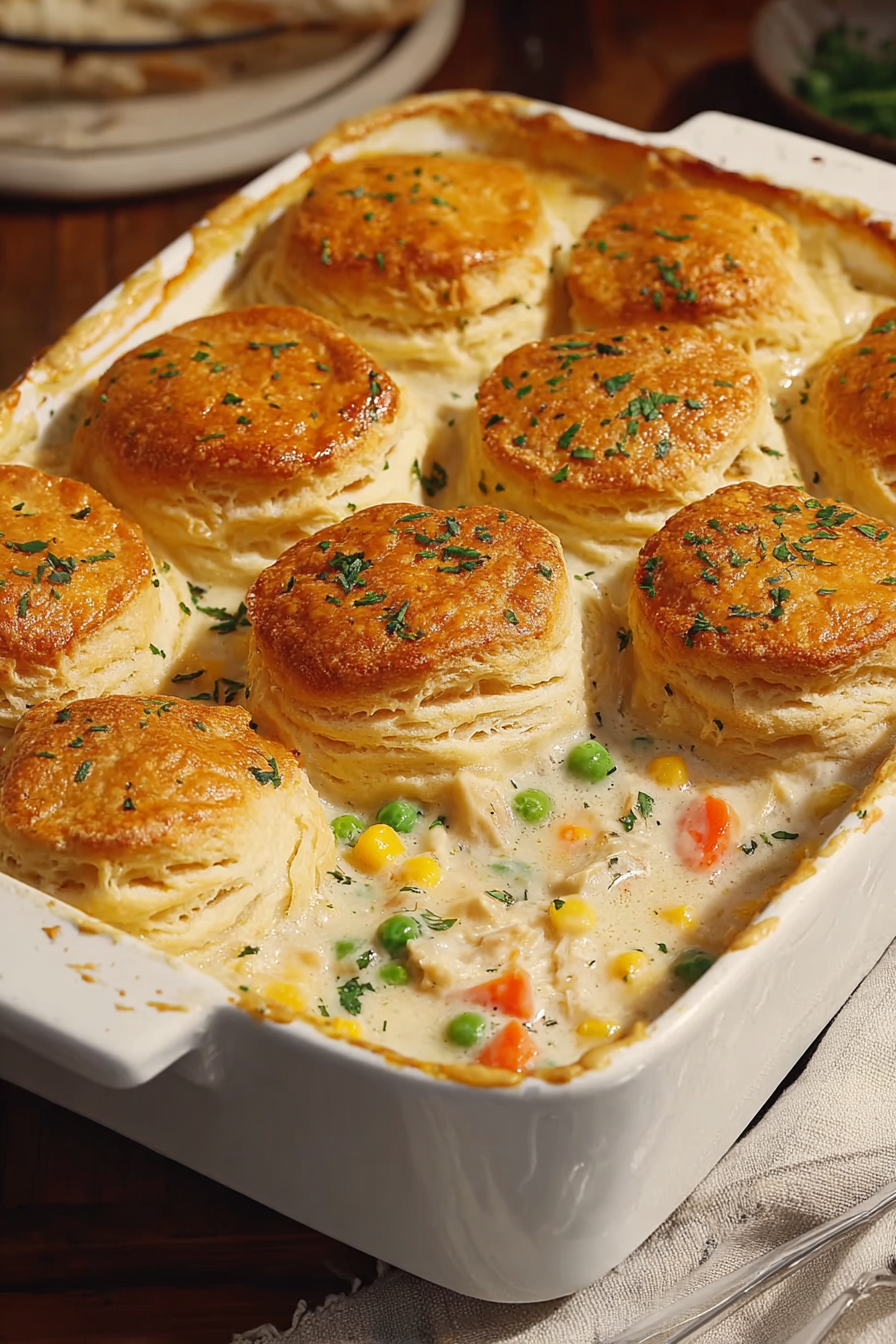
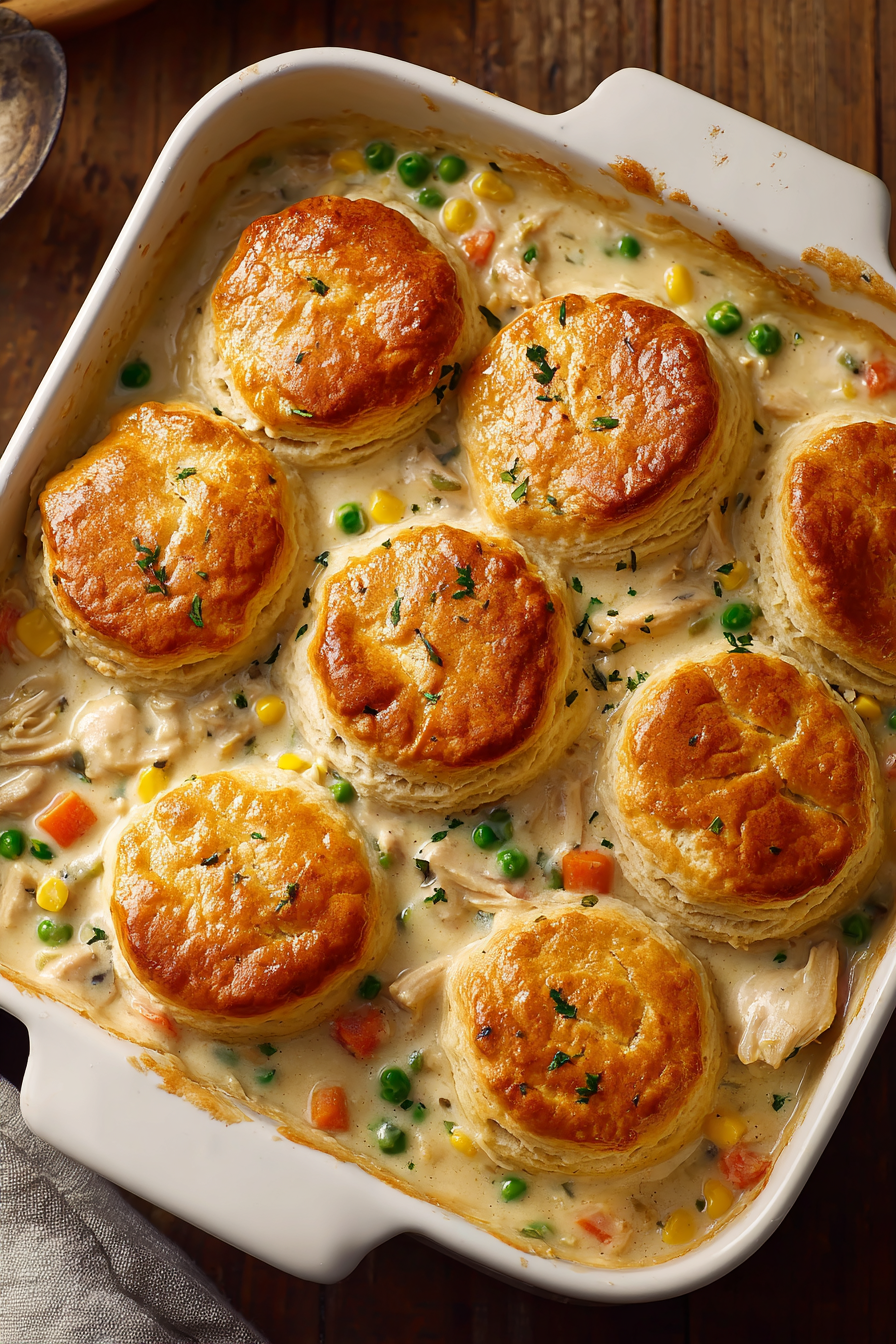
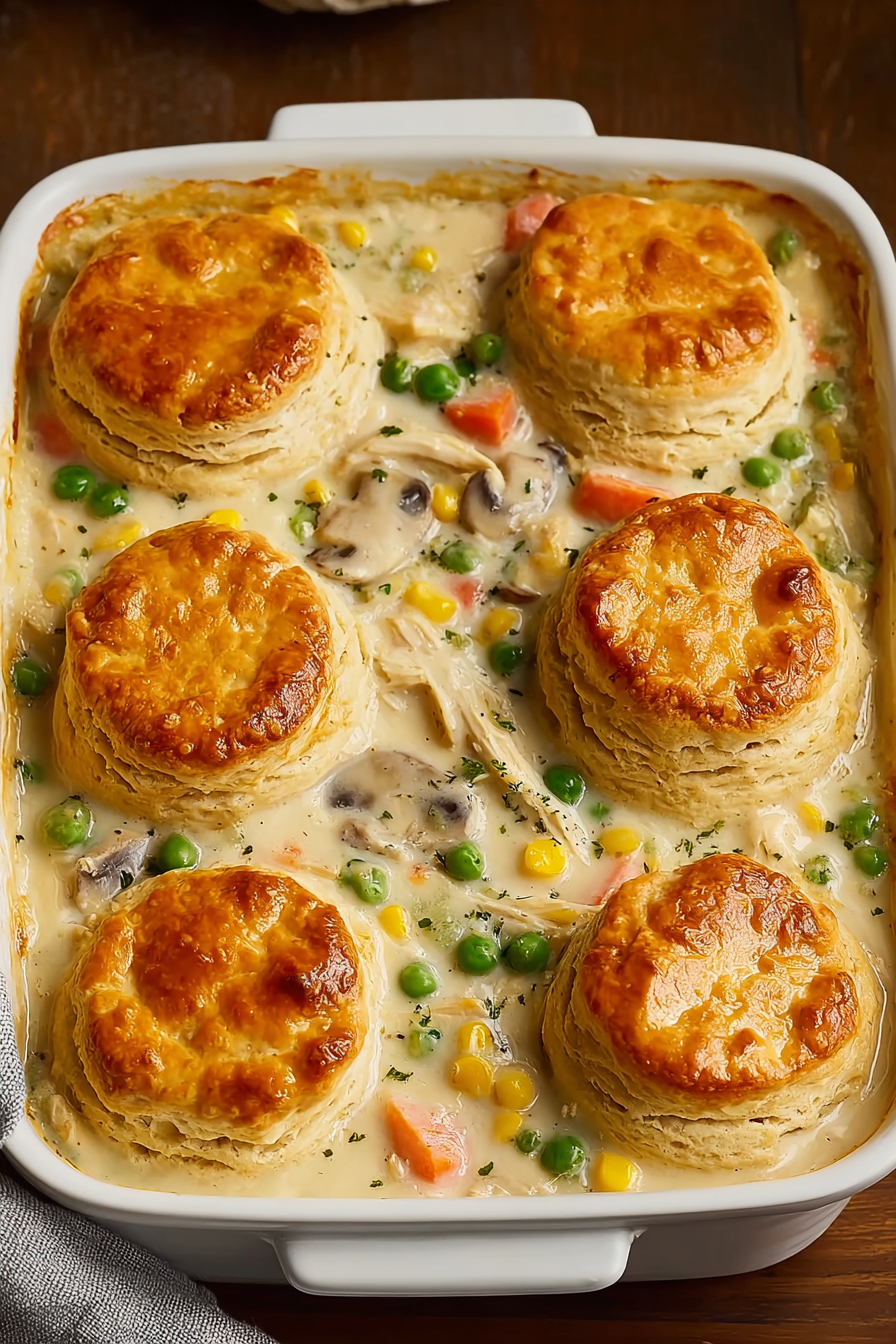
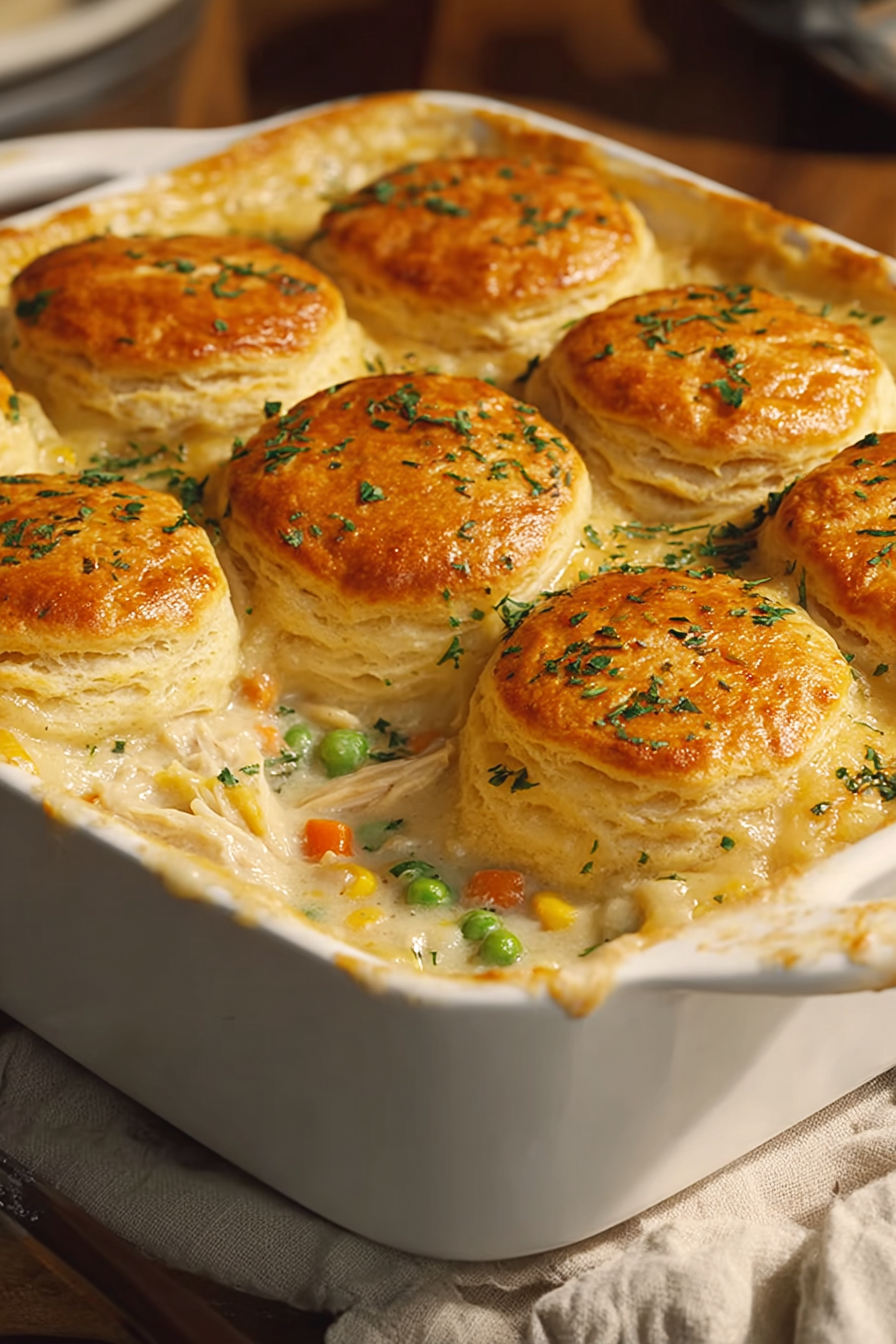
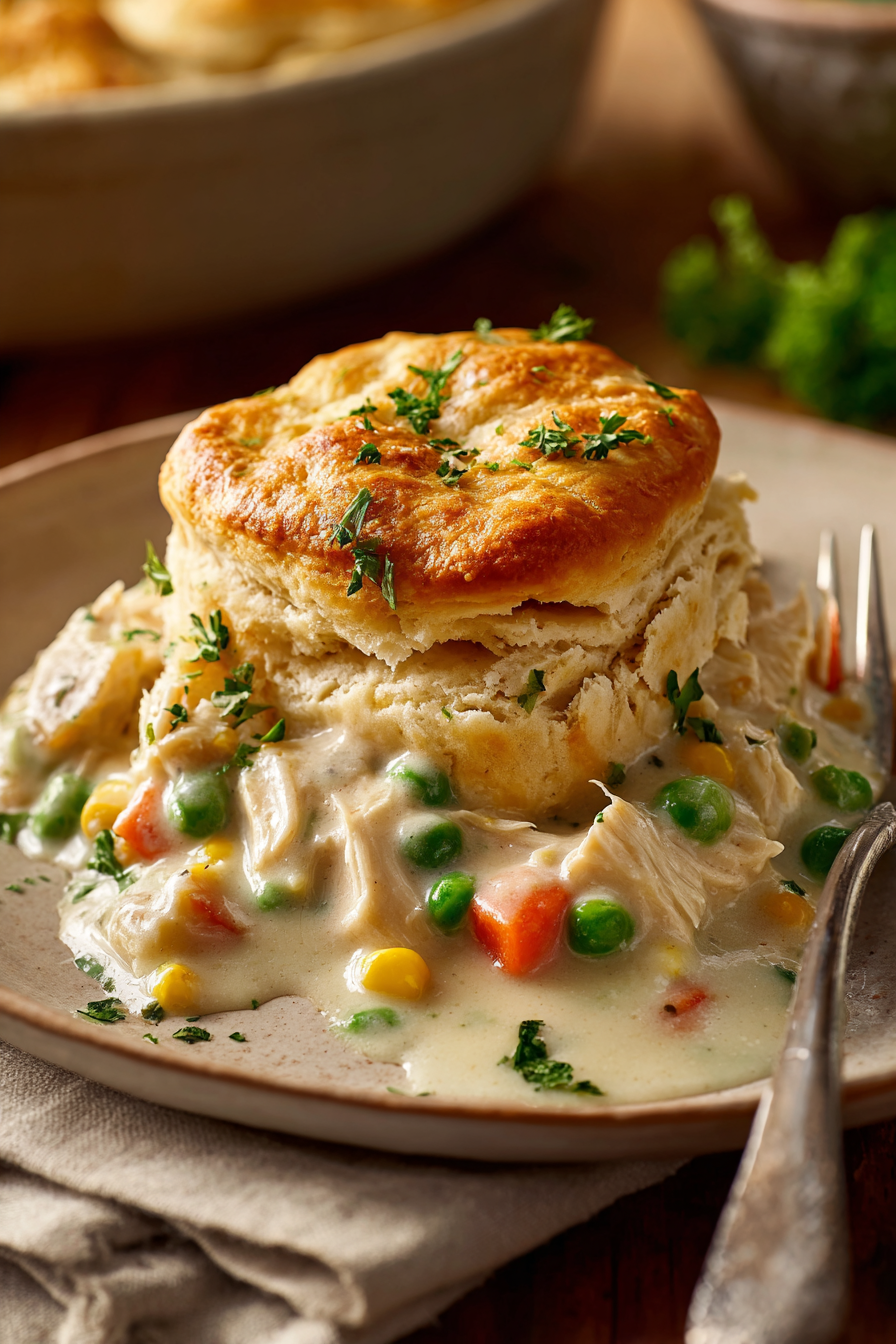
Homemade Chicken Pot Pie Casserole Recipe
Craving something hearty and satisfying? This Chicken Pot Pie Casserole delivers all the cozy flavors you love—juicy chicken, colorful vegetables, and a velvety sauce—finished with a golden biscuit topping that bakes up soft and fluffy.
Print
PinServings: 6
Notes
Ingredients
- 3 cups cooked chicken, diced or shredded (rotisserie chicken works well)
- 1 cup frozen peas and carrots mix
- 1/2 cup frozen corn (optional)
- 1/3 cup butter
- 1/3 cup all-purpose flour
- 1/2 teaspoon salt
- 1/4 teaspoon black pepper
- 1/4 teaspoon garlic powder
- 1/4 teaspoon onion powder
- 1 3/4 cups chicken broth
- 2/3 cup milk
- 1 can (16 oz) refrigerated biscuit dough (such as Pillsbury Grands)
Instructions
- Preheat the Oven
Set your oven to 375°F (190°C) so it’s ready when the casserole goes in. - Prepare the Roux
Place a large skillet over medium heat and melt the butter. Once melted, add the flour, salt, black pepper, garlic powder, and onion powder. Stir continuously until a smooth paste forms. Cook for 1–2 minutes, until lightly golden and bubbling. - Add the Liquids
Gradually whisk in the chicken broth and milk. Keep whisking as the mixture thickens, about 3–5 minutes. When it reaches a gentle boil and resembles a thick gravy, it’s ready. - Mix in the Filling
Stir in the cooked chicken, frozen peas and carrots, and the corn if using. Combine thoroughly, then remove the skillet from the heat. - Transfer to Baking Dish
Spread the chicken mixture evenly into a greased 9×13-inch baking dish. - Add the Biscuit Topping
Separate the refrigerated biscuit dough into individual pieces. Flatten each biscuit slightly and arrange them over the filling, leaving a little space between each one so they can expand while baking. - Bake
Place the dish in the oven and bake for 25–30 minutes, or until the biscuits are golden brown and fully cooked. - Rest Before Serving
Allow the casserole to sit for about 5 minutes after removing it from the oven. This helps the filling firm up slightly for easier serving.
Nutrition
Calories: 420kcal | Carbohydrates: 32g | Protein: 17g | Fat: 24g | Saturated Fat: 10g | Cholesterol: 55mg | Sodium: 1,050mg | Fiber: 2g | Sugar: 6g | Calcium: 220mg | Iron: 2mg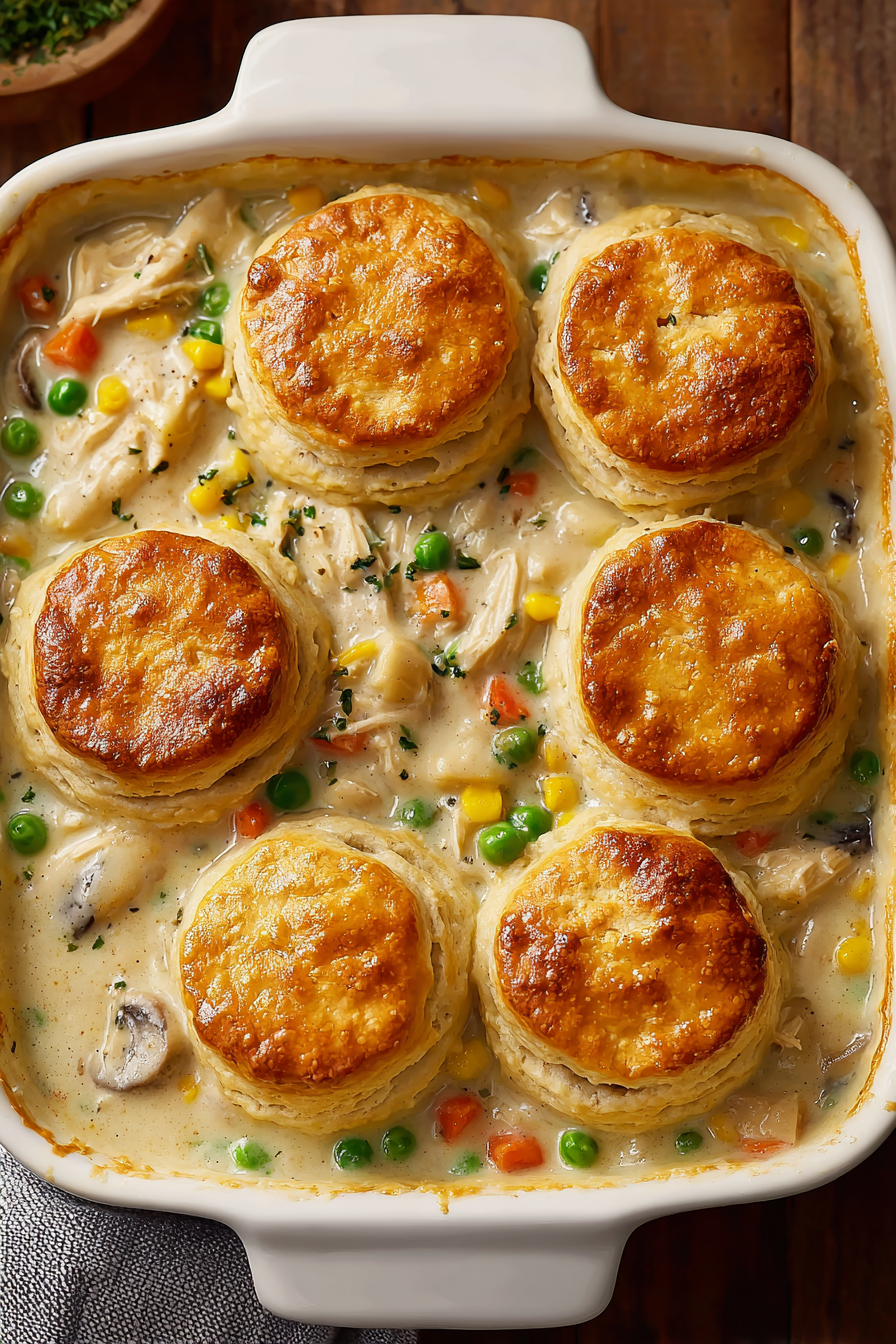
- What kind of chili works best?
Canned chili is perfect for convenience and keeps this recipe quick. If using homemade chili, make sure it isn’t too thin. A thicker chili works best so the buns don’t get soggy. - How do I keep the buns from getting too soft?
If you prefer a slightly toasted texture, you can lightly toast the buns before assembling. Some readers also like to brush the inside with a little melted butter to create a barrier. - Can I make these ahead of time?
Yes! You can assemble the chili dogs, cover tightly, and refrigerate for several hours before baking. When ready to serve, bake as directed until heated through and the cheese is melted. - Can I customize the toppings?
Absolutely. Add diced onions, jalapeños, sour cream, green onions, or extra cheese after baking. This recipe is very flexible and easy to adjust to your family’s taste.